Read supports single sign-on with a number of different SAML identity providers. This page explains the step-by-step process for setting up SAML authentication with Okta. For a list of other supported providers, see How to: Setup SAML Authentication with Read AI.
For instructions on how to set this up from Okta's perspective, see this help article from Okta.
Prerequisites
In order to set up SAML authentication with Microsoft Entra, you'll need:
- a Read Workspace with the Enterprise+ subscription
- someone who is an admin in your Read Workspace
- someone who can administer your Okta tenant
Step-by-step instructions
1. Get your ACS URL and Entity ID
Start by having a Read Workspace admin go to Manage Workspace > Settings and expand the Advanced (Enterprise+ Required) section. Scroll down to the SAML section, where you can find and copy the ACS URL and Entity ID:
You'll need these in a later step.
2. Set up your SAML App in Okta
a) On the Applications page click “Create App Integration” and select “SAML 2.0”
b) Choose a name for the integration then click “Next”
c) Configure the SAML Setup
Please update the SAML Settings and Attribute Statements as follows. Any field not described below or shown to be updated in the screenshot can be left as the default value.
- The “Single sign-on URL” value is the ACS URL that you obtained in step one
- The “Audience URI (SP Entity ID)” is the Entity ID from step one (
https://api.read.ai) - The “Name ID format” needs to be set to “EmailAddress”
- Two Attribute Statements need to be added:
- “first_name” with a format of “Basic” and a value of “user.firstName”
- “last_name” with a format of “Basic” and a value of “user.lastName”
d) Complete the Feedback step and Finish Setup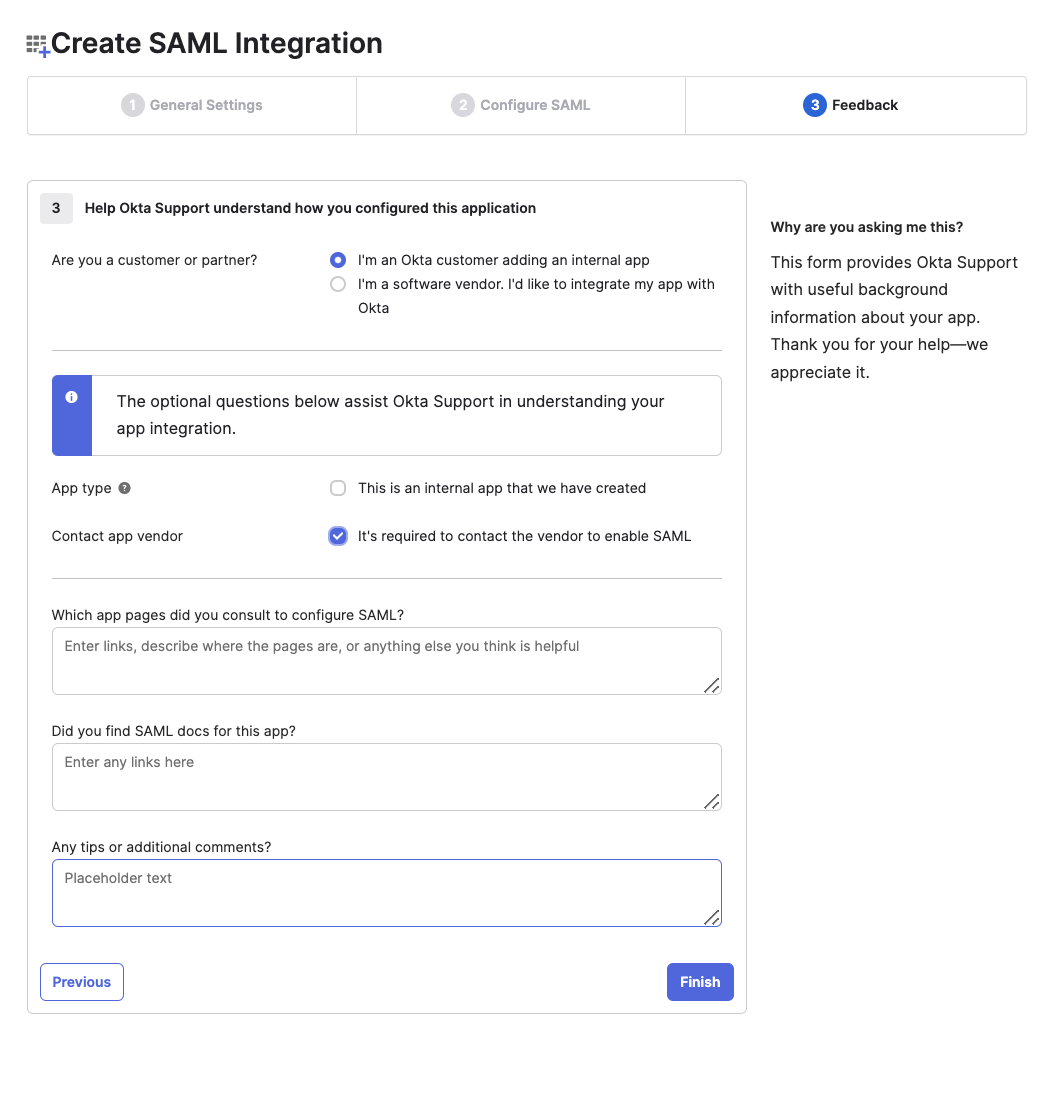
3. Save your Sign On URL, Issuer ID, and Certificate in Read
Navigate to the “Sign On” tab on the application page you just created and click on “more details” to reveal the following values that you'll need to copy and save in your Read Workspace settings:
- Sign On URL
- Issuer
- Signing Certificate
The Sign on URL goes under SSO URL, the Issue goes under the IdP Entity ID, and the Signing Certificate goes into the certificate field:
Click save once you're done entering everything.
4. Assign your SAML app to users
Next, you'll need to assign the Okta SAML application to the users who should have access to Read. Go to the "Assignments" tab and assign the app to individual people or groups:
You can always start with a smaller set for testing purposes, before adding everyone.
5. Test that it's working
Once you have finished setting up your SAML application and assigned it to users in your Okta configuration, you should test the sign-in process. Have one of your users go to your SSO URL/Sign on URL to see that it automatically redirects you to the Okta sign-in page first, and then to Read after successfully authenticating.
Once you've confirmed it's working, everyone that is authorized should be able to use the SSO URL to log in to Read. As always, please contact Read Support if you need any assistance.
6. [Optional] Disable other login methods by enforcing SAML
As an optional final step, if you would like to restrict your users to only logging in via SAML, please see Enforcing SAML for users in your domain. If this is enabled, users who try to log in from Read's sign in page will be automatically redirected to your SAML login flow.